Circuit Breaking
In this chapter we will configure circuit breaking using Istio. Circuit breaking allows developers to write applications that limit the impact of failures, latency spikes, and other undesirable effects of network peculiarities. This task will show how to configure circuit breaking for connections, requests, and outlier detection.
Preparing for circuit breaking
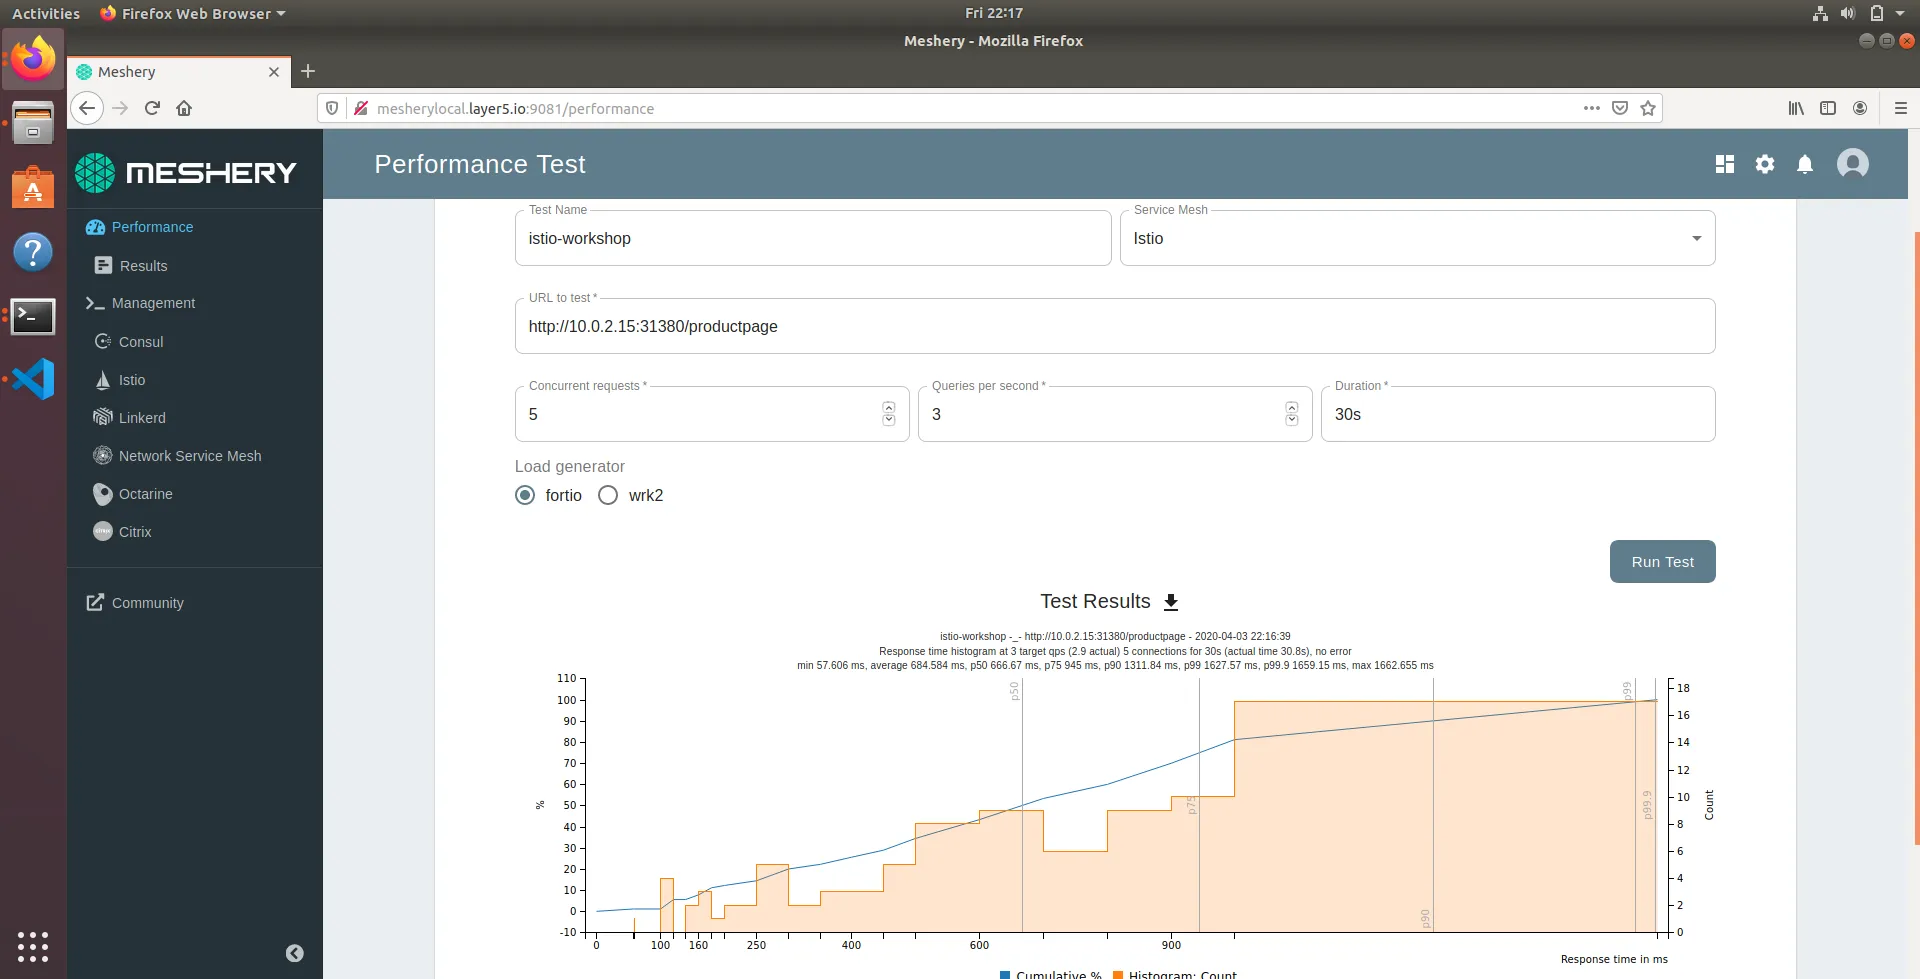
Before we can configure circuit breaking, please try to access the product page app from within Meshery to ensure all the calls are making it through without errors as we did in Observability chapter (see screenshot).
Configure circuit breaking
Now that we have the needed services in place, it is time to configure circuit breaking using a destination rule.
Using Meshery, navigate to the Istio management page:
- Enter
defaultin theNamespacefield. - Click the (+) icon on the
Apply Custom Configurationcard and paste the configuration below.
Manual step for can be found here
This will update the existing destination rule definition for product page service to break the circuit if there are more than one connection and more than one pending request.
In a few, we should be able to verify the destination rule by using the command below:
kubectl get destinationrule productpage -o yaml
Config:
apiVersion: networking.istio.io/v1alpha3
kind: DestinationRule
metadata:
  name: productpage
spec:
  host: productpage
  subsets:
    - /obserlabels:
        version: v1
      name: v1
  trafficPolicy:
    connectionPool:
      http:
        http1MaxPendingRequests: 1
        maxRequestsPerConnection: 1
      tcp:
        maxConnections: 1
    outlierDetection:
      baseEjectionTime: 3m
      consecutiveErrors: 1
      interval: 1s
      maxEjectionPercent: 100
    tls:
      mode: ISTIO_MUTUAL
Time to trip the circuit
In the circuit-breaker settings, we specified maxRequestsPerConnection: 1 and http1MaxPendingRequests: 1. This should mean that if we exceed more than one request per connection and more than one pending request, we should see the istio-proxy sidecar open the circuit for further requests/connections.
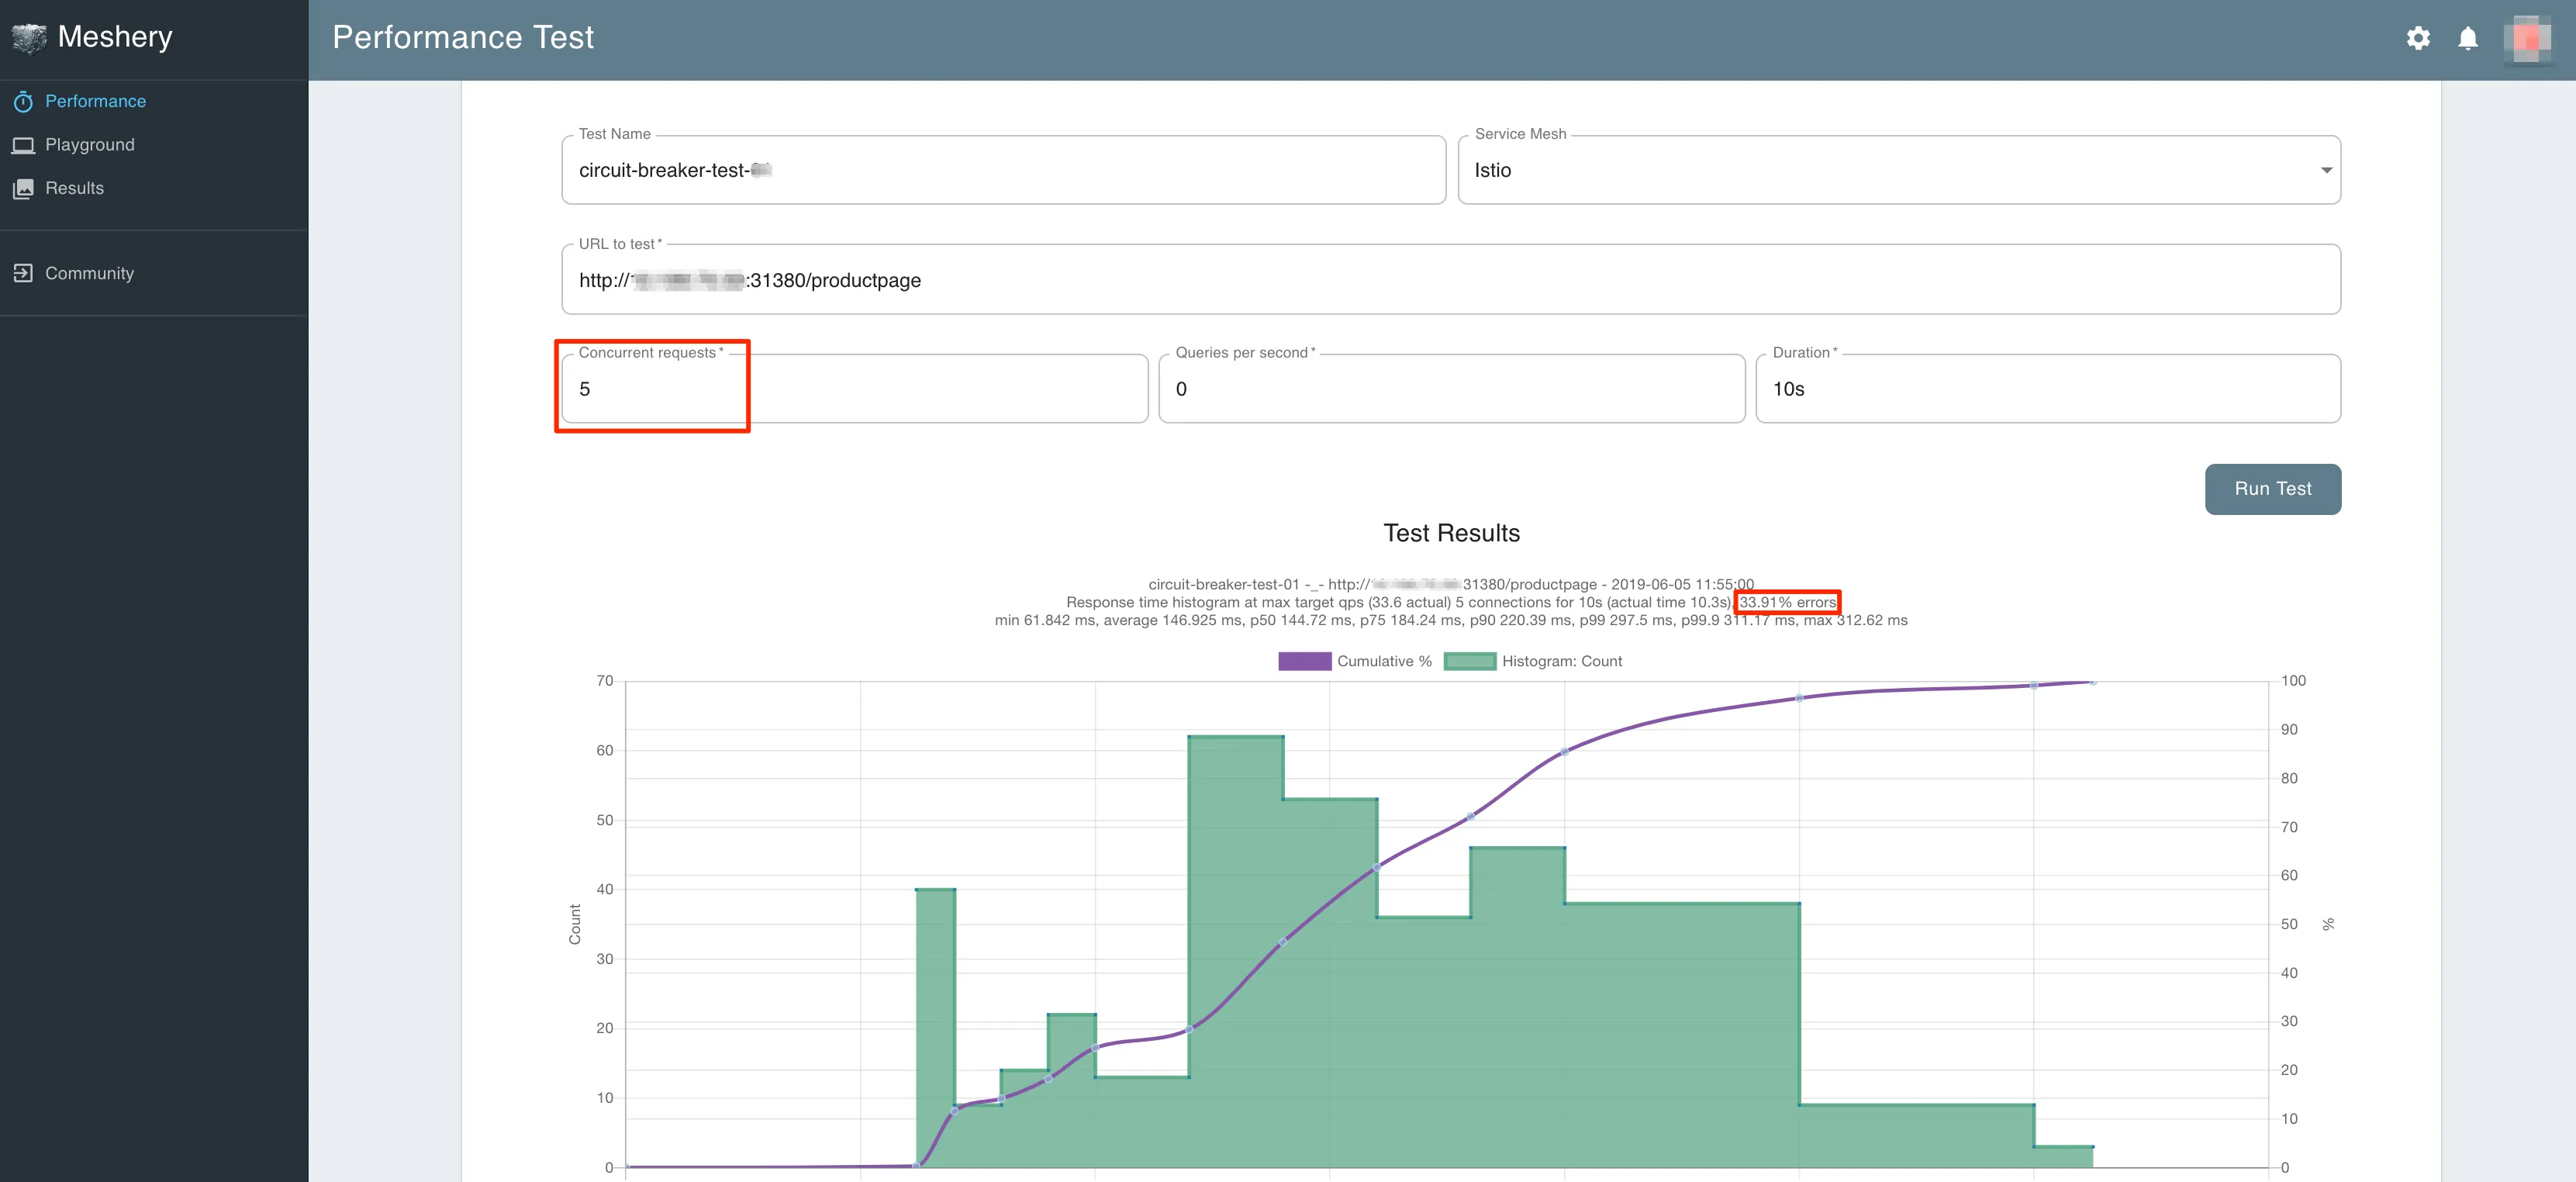
Let us now use Meshery to make several calls to product page app by changing the number of concurrent connections to 5 from within Meshery’s Performance page.
Once you have updated the fields, you now click on Run Test.
This will run the load test and show the results in a chart. ( see screenshot ).
You should only see a percentage of the requests succeed and the rest trapped by the configured circuit breaker.
{" "} Manual Steps
Configure circuit breaking
kubectl apply -f - <<EOF
apiVersion: networking.istio.io/v1alpha3
kind: DestinationRule
metadata:
  name: productpage
spec:
  host: productpage
  subsets:
  - labels:
      version: v1
    name: v1
  trafficPolicy:
    tls:
      mode: ISTIO_MUTUAL
    connectionPool:
      tcp:
        maxConnections: 1
      http:
        http1MaxPendingRequests: 1
        maxRequestsPerConnection: 1
    outlierDetection:
      consecutiveErrors: 1
      interval: 1s
      baseEjectionTime: 3m
      maxEjectionPercent: 100
EOF